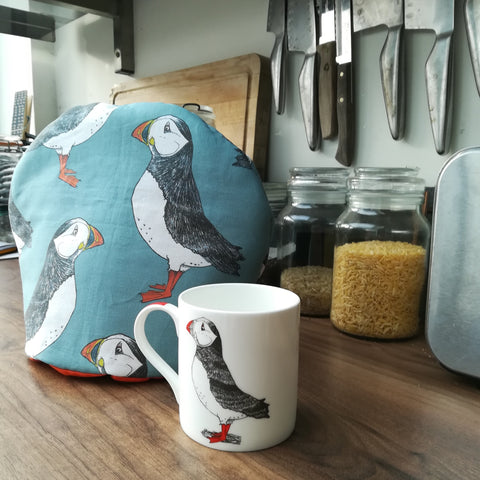
Tea Towel to Tea Cosy!

It's cold outside and tea drinking is at it's maximum, so we thought we'd start our 2019 m&h makes series with a tea towel to tea cosy make!
MAKE TIME: 1 hr 30mins
To make the tea cosy you will need:
- A m&h tea towel, available to buy here
- A fat quarter of coordinating cotton
- A fat quarter of 4oz wadding
- Sewing machine
- Pins
- Fabric Scissors
- Coordinating sewing thread
Step One
Measure the height and width of your teapot and add 5cm to the width and height.

Step Two
Cut out two rectangles from the tea towel, coordinating cotton and wadding using the measurements from your tea pot.
For example my teapot measures 30cm wide by 25cm high so the rectangles I cut out were 35cm by 30cm
You then need to curve all the tops of the rectangles, I used a slate cheesboard to draw round!


Step Three
Place the tea towel fabric and the coordinating cotton (this will be the lining of your tea cosy) right side to right side and the place the wadding on to of the wrong side on the tea towel fabric, pin together.

Sew all three layers together along the base of the tea cosy. We used a straight stitch 1cm up from the base of all the fabric. Be careful that your sewing machine foot doesn't get stuck in the wadding.
Do this for both sides of your tea cosy, remove the pins and trim any excess wadding.


Step Four
Open out both sides of your tea cosy with the lining one side and the wadding and tea towel material ( the outside of your tea cosy) on the other.
Place both right sides together and pin the seams together and then the rest of the tea cosy.
Sew the two sides together starting at one seam but remember to leave a 10cm gap at the top of the lining to be able to pull your tea cosy through.
We used a straight stitch 1cm up from the edge of all the fabric. Be careful that your sewing machine foot doesn't get stuck in the wadding.
Trim any excess wadding and threads.


Step Five
Pull the tea cosy through the gap left in the lining. Before you tuck the lining up into the tea cosy, sew the opening together by turning over the raw edges and sewing a running stitch over the top (don't worry if it's not really neat nobody is going to look at the inside of your tea cosy)!

Tuck the lining up into the main body of the tea cosy and ta dah you've got a new tea cosy or hat!

